SO · Sound & sessions
First Pair of Mics: Voice and Instrument
How to place a first pair of microphones for one voice and one acoustic instrument in the same room: spacing, height, axis, and the bleed you keep on purpose.
By Kook & HoomenPublished 1222 wordsSO-002

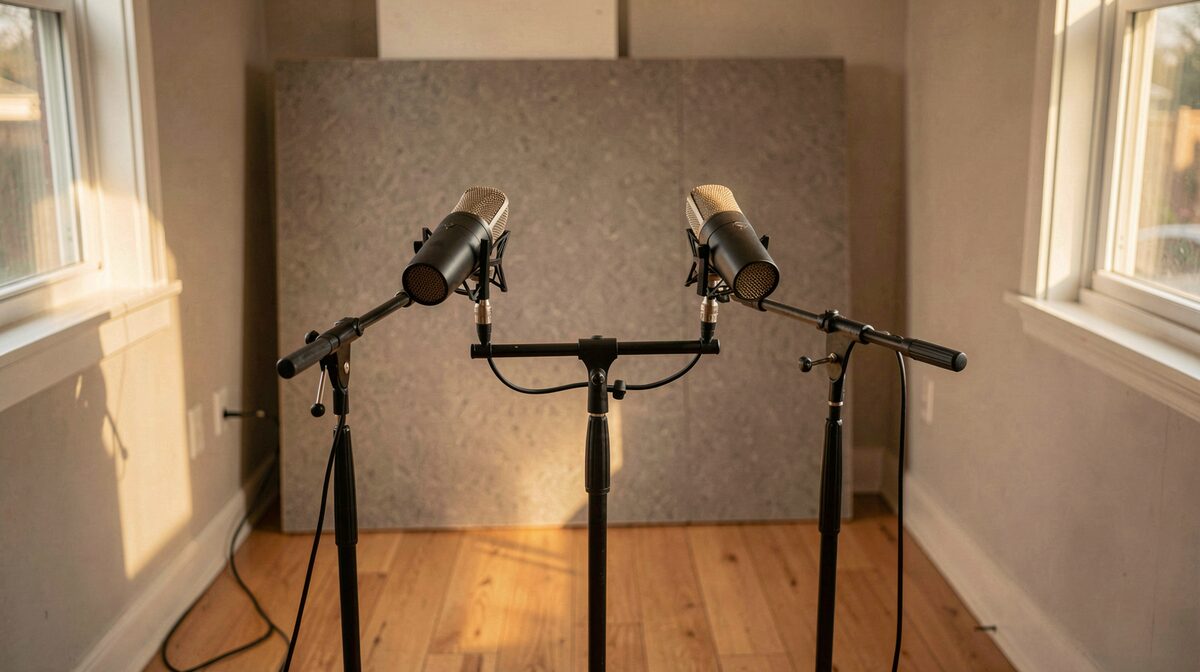
Put the voice mic 25 to 30 cm from the mouth, slightly off axis and a hand's width above it. Put the instrument mic 40 to 60 cm from the body of the instrument, aimed at the spot where the sound leaves it, not at the strings under your hand. Keep both capsules at the same height and the same distance from the floor, and let them bleed into each other on purpose: that shared room sound is what makes two tracks sit as one performance instead of two takes glued together. The same idea runs through the chamber work described at Credo summer string program, where players learn to listen across the ensemble rather than to their own line.
The short answer, with numbers
Voice: cardioid condenser, 25 to 30 cm out, 10 to 15 cm above the mouth line, tilted down 15 to 20 degrees so the capsule looks at the chest, not the teeth. That angle cuts breath noise and the hard edge of plosives without a pop filter doing all the work.
Instrument: cardioid or wide cardioid, 40 to 60 cm from the top plate of a guitar, the belly of a violin, the soundboard of a piano, or the bell side of a woodwind. Aim at the part that radiates, not at the part your hands touch. On a guitar that is the twelfth fret area, 30 to 40 cm out. On a violin it is above the f-hole, 50 to 70 cm out. On a piano it is over the strings, 30 to 50 cm above and 20 cm back from the hammers.
Height: both capsules at 1.2 to 1.4 m from the floor for a seated player. That is roughly mouth height when sitting, and it keeps both mics out of the floor bounce, which is the first thing that makes a home recording sound small.
Distance between the two mics: 60 to 90 cm. Closer than 60 cm and the two sources collapse into one blurry image. Wider than 90 cm and the voice and the instrument land in different rooms in the listener's head.
Why keep the bleed at all?
Because a completely separated voice and instrument sound like two people in two buildings. When you close-mic both sources and gate the bleed out, you get silence between phrases where the room should be, and the mix has nowhere to sit. A little bleed from the instrument mic into the voice mic, and the reverse, carries the same early reflections and the same air. That is the glue.
How much bleed is right? Aim for the other source sitting 12 to 18 dB below the main source in each mic. If you can hear the instrument clearly in the voice mic at normal monitoring level, you are 6 dB too hot. If you cannot hear it at all when you solo the voice mic, you have gone too far the other way and the two tracks will not fuse.
This is the same principle behind any serious summer program for young string players: the point is never the isolated part, it is how the parts answer each other in one room.
Where do the two mics point?
Use the 3:1 rule as a starting point, then break it on purpose. The rule says the distance between mics should be at least three times the distance from each mic to its source. With the voice mic at 30 cm, that puts the instrument mic 90 cm away. That is the top of the range above, and it works for a quiet instrument.
For a loud instrument, a guitar played with a pick or a cello in a small room, pull the instrument mic back to 60 cm and accept more bleed. For a quiet one, a nylon-string guitar or a flute, bring it to 40 cm and keep the voice mic at 25 cm.
Axis matters more than distance. Point the voice mic down at the chest and the instrument mic across the body of the instrument, roughly 90 degrees apart in plan view. Two mics aimed at each other pick up the same room mode twice and phase-cancel around 200 to 400 Hz, which is exactly where a voice and a guitar both live. Keep the capsules parallel or angled apart, never facing.
What about the room itself?
Treat the wall behind the player first. A moving blanket or a mattress leaned against the wall 1 m behind the performer kills the slap that arrives 6 to 10 ms after the direct sound and muddies everything above 1 kHz. The floor comes second: a rug under the chair, no bare tile.
Do not deaden the whole room. You want 0.3 to 0.5 seconds of natural decay. A completely dry room makes the bleed useless, because there is nothing in it to share. If you clap once and hear a short, even tail rather than a metallic ring, the room is ready.
How do you set the levels before you record?
Set gain on the voice mic first, with the instrument silent. Aim for peaks at -12 dBFS. Then set the instrument mic with the voice silent, same target. Then have the player perform the loudest passage of the song and check both channels: if either hits -6 dBFS, pull that preamp down 3 dB and try again.
Record at 24 bit, 48 kHz. The extra headroom of 24 bit means you can leave peaks at -12 dBFS and still have a clean signal, and 48 kHz keeps you compatible with any video you shoot later.
What goes wrong when you skip a step?
Skip the height match and one mic sits in the floor bounce while the other does not. The result is a voice that sounds close and an instrument that sounds like it is in a hallway, and no EQ fixes that.
Skip the axis check and you get a hollow band around 250 Hz that you will try to fix with a notch, which removes body from both sources.
Skip the bleed target and you either gate the life out of the take or you fight a muddy mono blob. Measure it once with headphones and a solo button, write the number down, and you will not have to guess again.
Skip the wall treatment and every phrase ends with a small metallic aftertaste that you cannot remove without dulling the top end.
A placement you can set up in ten minutes
- Player seated, 1 m from the treated wall, facing into the room.
- Voice mic at 28 cm, 12 cm above the mouth, tilted down 15 degrees.
- Instrument mic at 50 cm from the radiating part, same height as the voice mic.
- Both capsules 70 cm apart, angled 90 degrees in plan view.
- Rug under the chair, blanket behind the player.
- Gains set one at a time, peaks at -12 dBFS.
- Record a 30 second test, solo each channel, and check that the other source sits 12 to 18 dB down.
If the test passes, record the take. If it does not, move one mic at a time, never both, and note what changed. Two or three passes and you will have a placement you can repeat in any room with a wall and a rug.
Reading notes
Next on the programme
 SO-003 · Sound & sessionsMix Down Low End for Small Speakers
 SO-001 · Sound & sessionsRecord a Small Room So the Mix Has Somewhere to Sit
 CR-001 · Craft & notesStore Negatives, Drives and Masters for a Move


